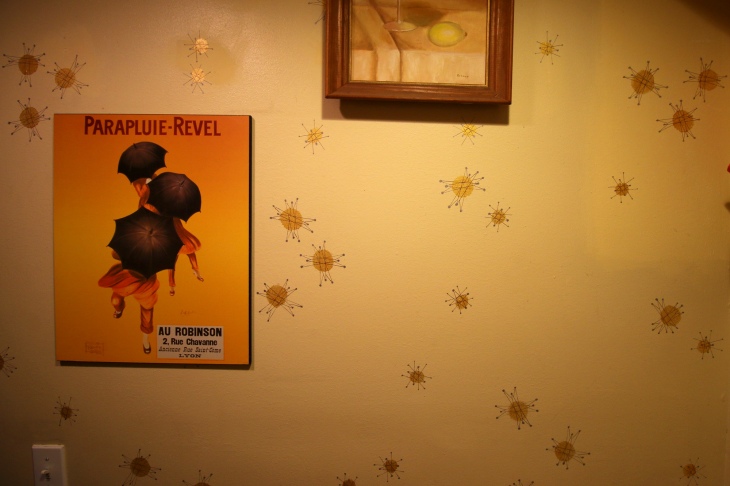
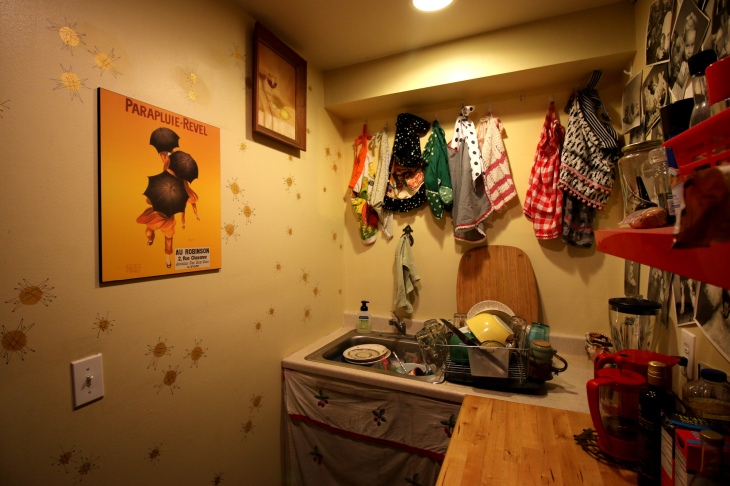
I was browsing through my favorite home decoration site, Retro Renovation, and stumbled upon a fabulous idea for hand-painted “wallpaper”. Not only was it super-cheap and super-easy, it was a fabulous retro-atomic starburst shape! While I don’t have a lovely post-modern home like I drool over on Retro Renovation posts, my current garage loft living can use all the help it can get. Yes… I live in an industrial garage! Because this is just a “for a few years” sort of situation, it doesn’t warrant any interior decorating that is either expensive or time consuming… so this DIY project fit the bill perfectly.
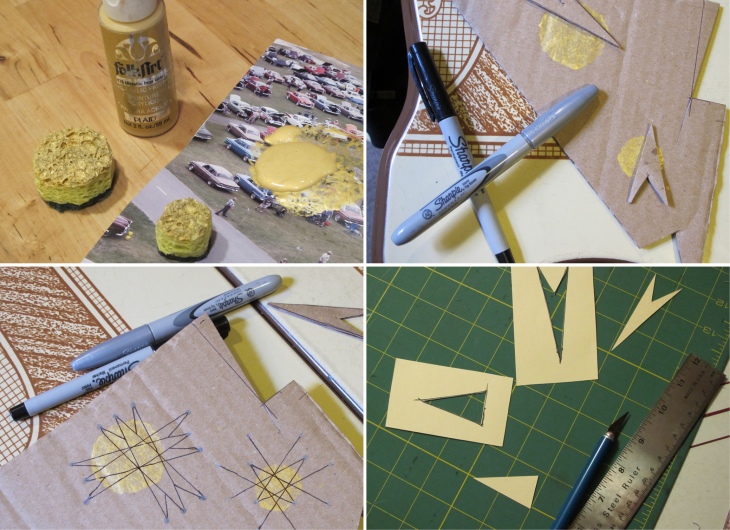
Everything I needed for this project I had on hand. While the original RR post used wall paint, I decided upon some gold crafting acrylic paint I had laying around. Then rather than do all the lines and dots in black Sharpie, I did the lines using a thin-tip black Sharpie and the dots using a regular-sized silver metallic Sharpie. A word to those planning on trying this, the Sharpie needed some coaxing throughout the project – it may be the satin paint on my walls, but I was constantly stopping to mark the Sharpie on paper until the ink worked again. I decided to try this out first on a small wall in my kitchen – with plans to do another part of my home if I liked it (which I do!) Next time I’ll probably test out using a paint-pen for the lines instead.
Even non-crafters shouldn’t need a template for this. I just eyeballed the shapes and cut them out of cardboard, testing out how they looked before taking to my wall. Half-way through the project I realized it would be much easier to trace inside a cutout than around one… and it was so, so, SO much easier and faster! So figure out the shape you want to use, then make a cutout of the shape in heavy cardstock (which worked better than the cardboard which was a little too thick).
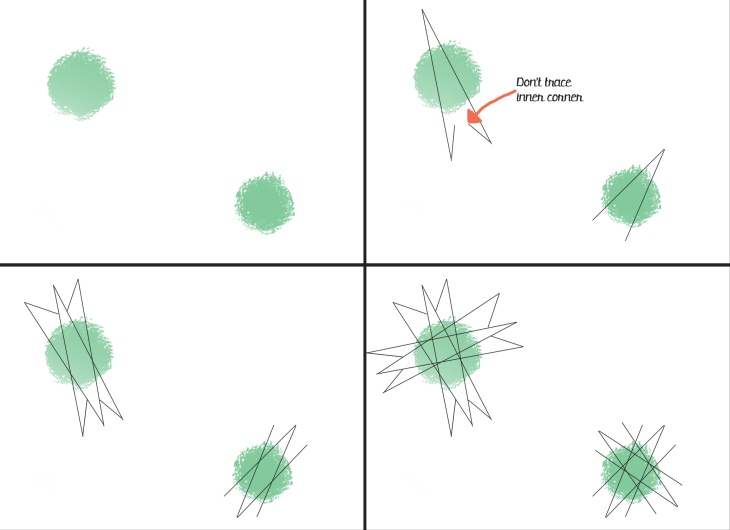
Using the circles cut from sponge, go to town on your walls making random clusters. Keep in mind that you’ll need room for the lines, you don’t want the finished shapes to overlap. Next trace the shapes. Put one, than turn it 180 and trace it again. Then rotate about 90 degrees and do it all over again. I varied them quite a bit so I didn’t have perfect 90 degree angles everytime. On the larger starburst, the inner-angle is not traced, as shown in the image above. On the smaller starburst, the third side of the triangle is not traced either.
All-in-all I probably spent four hours and $2 on this project (It was the perfect way for me to relax on the weekend before a very busy week at SEMA!) I love how much fun it adds to my wall – and it also helps to hide some less-than-perfect wall patches! What’s been your favorite painted wallpaper project?

Very nicely done!!!!!
Thanks Pam!